Sunday, December 14, 2014

Planning, Planning, & More Planning

Although you're already halfway-ish (totally making that a word) through the school year, the new year is right around the corner.  So obviously we think of resolutions when talking about the new year.  Instead of focusing on giving up pop, losing weight, or stopping your shopping addiction (wait, is that just me?)...why not make a career-based resolution? Think about your lesson plan template...does it work for you? Are you able to put everything you need to keep you on track during the day or prove to your administration that you're meeting all the demands of the lesson design process? After years of messing with multiple lesson plan templates, I think I found something that works for me, and hopefully it will be your lifesaver as well. 

The "odd" thing about this template is it is used vertically instead of horizontal.  Before you think I'm crazy, I still keep my lesson plans in a binder, only it is vertical on my desk rather than horizontal. It actually takes up less usable space on my desk. Win-Win!

A breakdown of what the first half of my day looks like:

At the top
  • Spot for date
  • General objectives for each subject area (in red)
  • Breakdown of days of the week
Left side
  • Time slots throughout the day (Do not have the subject area listed on this copy)
  • Each standard I am currently teaching in that subject area (in green)
Middle
  • All lesson ideas (Room for all parts of lesson design: Antic=Anticipatory set, GP=Guided Practice, IP=Independent Practice)
  • Just an FYI, since assessments take a decent amount of time, I use larger font. 


 A breakdown of what the second half of my day looks like:

*Note the dates are not at the top of this one, since the binder is turned to read down per day, rather than across like many of us are used to. The rest of content is filled in per lesson.

Bottom:
  • Homework section: Helps me get materials ready, remind students, and stay organized on what is expected of them throughout the week
  • Meetings: Helpful to see what meetings after-school, whether it is with staff members or parents.
  • Misc/Birthday: I also will type in a section for miscellaneous information or student birthdays as well.
  • Did You Know? Although, this example does not show it. In the past I have done a "Did You Know? spot in my room where I put random  facts...sometimes in cursive so students can practice reading cursive. Just a fun & silly way to incorporate more learning in the classroom!


Friday, December 12, 2014

Help! What do I do with Students who Finish Early with....EVERYTHING?

What to do with students who finish early on EVERY task? Well, we all know the best thing you should be doing is differentiated for that student.  You should be giving them the appropriate level of work.  But, as teachers, we know we need them to prove themselves with their current grade level material before we move onto more challenging work.  So what do you do in this battle?

We all know everyone has their own strengths and weaknesses. One of my weaknesses is keeping up with my blog posts like I would like to!!

When I am unable to predict a student is going to finish a task early; I have a back up plan!  I have created these folders to hang on my wall, but if you don't have the space, you can easily put them in a binder or on a shelf.

I created mini-topic sheets that go along with the Common Core Standards (Both Math & English Language Arts).  It works for grades 1-5.  Each topic sheet is correlated with a standard subject such as, Figurative Language or Subtraction.  I normally keep them general, so many different activities can go into those folders.  I do not put out all the subject areas at one time because that tends to be overwhelming or we may have not covered that particular subject yet.  I put out four ELA and four Math folders, and the subjects include ones I am covering that quarter (but this could easily be done monthly or even weekly if you prefer).  Visit my TPT Store for activities and worksheet ideas!
Glue them on the folder or a clear sleeve. Put them in a bin or hang them...the choice is up to you!

I put the covers in a clear plastic binder sheet, and attach it to a regular pocket-folder.  Inside each pocket-folder is a variety of activities, worksheets, resources, etc. that a student could do if he/she finishes early.  I train students early in the year when you can/can't go get "extra work".  This eliminates students getting up saying they are "done" with independent reading. HA!

Now I know what you're thinking...worksheets?! Really? I select these worksheets to be a challenge or great extra practice for students with that particular skill. I am not just throwing out random worksheets as "time killers".  I want students to get better. I mean, that's my job, right?  I look through the internet or my file cabinet to find appropriate activities/worksheets and make a handful of copies. I learned early on to not copy 20+, because it will just be a waste of paper.

Along with the early finishers, I allow students to pick a few worksheets to take home for "extra homework". Before you think I'm crazy, I give students a reward if they do it to the best of their ability and bring it back so I can look it over.  In our school, we use a tally system which leads to bigger prizes, etc. I gave them a tally for each paper they brought back.  If you don't have something like this in your school, you can easily handout coupons to reward them for going Above & Beyond! You could keep track of how many "extra" sheets they do, and they get a reward ever 4-5 times they turn something in (depending on the grade you teach). It may seem little, but these extra minutes of practice are going to help them become successful students, pass those high-stakes exams, and be proud of the fact that they are working harder than they need  to!


Wednesday, December 10, 2014

10 Amazing Links to Christmas Crafts

Happy December! I, personally, cannot believe it is December let alone almost 2015! To start off the holiday season, check out the Top 10 Links below that include crafts, gifts, and food ideas to do with your kids and/or students! I made this list thinking about a variety of skill levels, amount of resources to create them, and of course...time. Depending on which of these you struggle with, hopefully you can find one...or two that will work well for you and your children/students!

Top 10 Festive Activities to do with Kids:
  1. Popsicle Stick Ornaments
  2. 36 Adorable Ornament Ideas
  3. 30 Kid-Friendly Handmade Ornaments
  4. 25 Kid-Friendly Crafts
  5. Child Friendly Christmas Tree Ideas
  6. DIY Holiday Wrapping Paper
  7. Applesauce Ornaments
  8. Easy Snowmen Crafts
  9. Yummy Holiday Treats
  10. All Skill Levels for Festive Treats for Kids  

The Gift of Giving
In my classroom, every year we make an ornament for students to share with someone at home.  They wrap it in a small bag, and take it home the day before Winter Break.  Students are really excited about this!  I also think it is important to teach them the gift of giving.  Since I cannot control what they do with their ornaments when they get home, or enjoy the look on their parents' faces when they give it to them...I do this at school as well.  We make about 20+ extra ornaments to pass out to administration, support staff, and other special helpers that help us in our classroom.  Students work together to complete the extra ones.  The last day before Winter Break, we walk around the school with the wrapped ornaments to give to these special people in our life.  Students are SO excited to see the faces of the teachers open their packages.  Students do a really great job walking around the building finding our gift receivers.  All-in-all, my goal is for students to feel the gift of giving, rather than receiving. My hope is they will continue to love the feeling of giving so they grow up to be well-rounded, caring members of their community.


Ornaments My Students Have Completed
As friends and family members are putting up their Christmas decorations, a great friend of mine sent me this picture below:

You just have to smile when looking at art of an 8-year old. Made with lots of LOVE!

It makes me happy, as I'm sure it would as well for my students last year, to know teachers are proudly displaying my students' work of art on their trees still! So we obviously made Christmas Trees out of Popsicle sticks this past year.  It was a total of 1 center a day for 3-days...so not much academic time was missed out to make these trees.  Day 1: Painting the sticks; Day 2: Gluing the sticks together & decorating; Day 3: Items are dry, so we write on the back & add a ribbon to hang! I leave a day in between the gift giving just in case someone is absent or something goes wrong.  By Day 5, students are giving out their gifts. 

A mentor of mine taught me how to make cinnamon ornaments with my students.  We have done this activity in the past, which makes my room smell wonderful.  It does take a little more effort as baking is involved.  One year, students made these circle-shaped foam ornaments one year.  They were able to draw, decorate, and glue tons of fun things on them and they only took a couple days as there was minimum amounts of drying.  So if you're running low on time, run to the craft store and pick up multiple shaped foam pieces and make some cheap and engaging ornaments.

Good luck finishing those presents and have fun sharing the holiday spirit with your students, fellow colleagues, and your own family!

Happy Holidays
and as always...


Thursday, November 27, 2014

My Gift to YOU!

Happy Holidays from 3L + 1T!  My gift to you all for being great followers, a Teachers Pay Teachers sale! On December 1st and 2nd, enjoy 20% off of ALL (yes, that is correct) ALL of my products in my store. With the gift TPT is giving you, you can save up to 28% on products.  What a great way to start the New Year!

http://www.teacherspayteachers.com/Store/Sarah-Becker-5948
Click the banner above to go directly to my store!

Check out my other blog posts for great ideas and direct links to products.


Wednesday, November 26, 2014

Making Your Math Block Full of Holiday Cheer

I love teaching around the holidays, as it adds something new and exciting in terms of themes. It is a fun way to keep them engaged, as we know they are all thinking about holiday treats, presents, and snow days! So why not include those items they want to discuss with you into something educational? This post is all about including holiday cheer into your math block, but if you're looking for literacy based activities, visit my holiday literacy post.

Perimeter and Area

In my math block, we were studying perimeter and area (now that we are finally learning our multiplication facts!) in December.  I decided that I didn't have time to do something too extreme, like wrap multiple shaped packages to them to find the actual perimeter and area. I love activities, but I did not have time for that!

I created an interactive worksheet where students can work with presents of all shapes and sizes to find the perimeter and area.  Now, we haven't worked too much with measurement this year, so I didn't have them use their own measurement tools, but you could do this (outside of my TPT product).

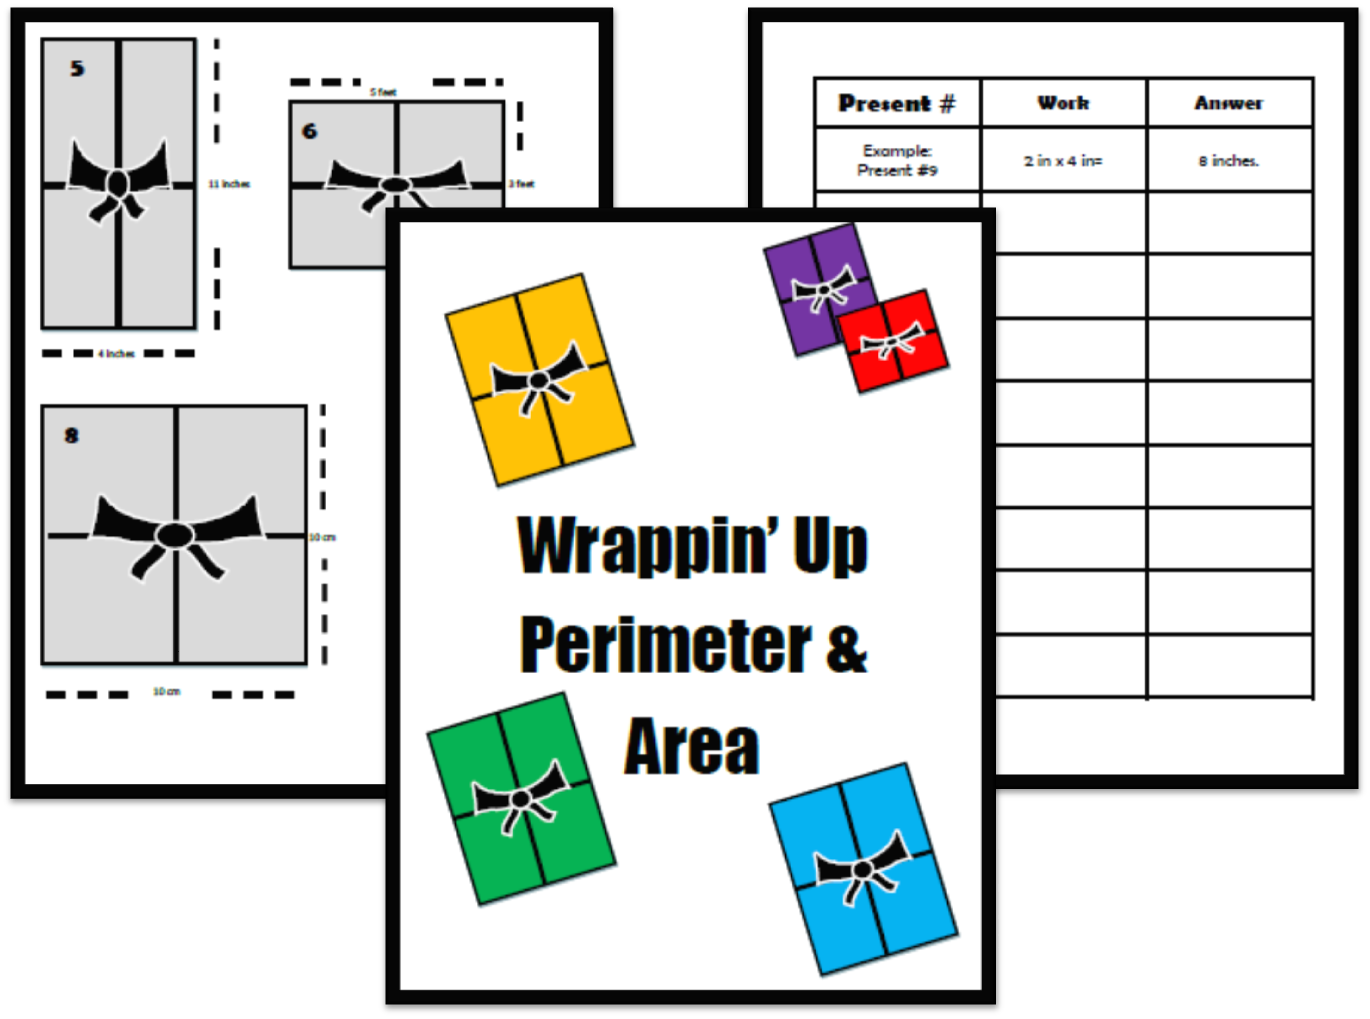
Find my "Wrappin' Up Perimeter and Area product...HERE!


Roll a Holiday Tree 

I also think it is fun for my students to have some holiday fun during centers/stations. Although the rest of my centers may include current skills, I like to include one engaging one where they can work in partners/small groups with dice to complete a task.  I also don't add a lot of coloring, drawing, unless it has a complete educational purpose...but this time, I don't mind!

Roll a Holiday Tree is where students take turns rolling the dice.  When it lands on a certain number they draw the item associated with the number.  For example, if 4 says to draw the ornaments, that's what they have to draw first. The pictures end up coming out great as they have to really think about the placement if they are not able to draw the tree first.  The product works on teamwork, following directions, number skills, and fine motor skills.

Go to my Teachers Pay Teachers store for other holiday activities or view the product here!

*Holiday Literacy Activities

If you are also wanting some literacy activities to complete around the holidays, I have a post on this as well.

Happy Holidays from 3L + 1T!!


Adding Literacy During the Holidays

Book Clubs

Winter Break is right around the corner which means students will start getting a little antsy as they are getting ready to be on an extended beak and well for the most of us around the States they are stuck inside because of cold and snowy weather outside. I really try to make the 3 weeks in December really engaging, although I want them to still have lots of academics before break as well.  Chances are many students won't read a single word over their 2-week break. Scary, Scary, Scary!

I LOVE book clubs, or many call them, literature circles. I enjoy these because they are highly engaging, group oriented, bring a lot of discussion amount equivalent readers, and all have the reading/writing connection.  I have created 4 different holiday book clubs for my third grade classroom. The book selection was based on the needs of my classroom, so these may not translate  to every third grade class around the world.

  1. Judy B. Jones and the Yucky Blucky Fruitcake (GR: Level M)
  2. Judy Moody & Stink, The Holly Joliday (GR: ~Level M)
  3. Miss Holly is Too Jolly (GR: Level O)
  4. Who is Stealing the 12 Days of Christmas? (GR: Level Q)
Each book contains a breakdown of what chapter(s) to read during a 7-day period, except for Who is Stealing the 12 Days of Christmas? as this was my highest reading group and I was able to work with them a little differently since the book was at a higher level.  The group was independent enough to work on their own and together to complete the task.

Each group met with the teacher 2-3 times during their 7-day book club project.  I know 7 days does not match up with a normal school week, so it was technically a two week project (10 days).  Seven days they were reading, 1-2 days to catch up if we were behind, and/or 1-2 days to complete the final project.

The final projects were group oriented and we spent 1.5 Literacy Blocks completed them.  Because I wanted everyone to learn about the books other groups read, we created large movie posters (No pictures...bummer, I know!) to try to entice classmates to read this book over break.  Each student had a job (writer, artist, leader, supply manager, time manager, question master, presenter).  I hope to have a blog post soon on how these group activities work in my classroom.

After they completed their movie poster, they presented to the class what the book was about (without giving too much away).  It was a great informal assessment as you could truly tell which group members understood the book well and could answer the questions their classmates asked with confidence.  I added this as a grade as well.

A little more about the books/questions:

 Judy B. Jones group is asked to complete summaries of each chapter they complete using Somebody, Wanted, But, So, Then and then completed a final summary in paragraph form of the book. Judy Moody's group is asked to complete a variety of questions about the text. They are comparing/contrasting, describing, identifying, and summarizing.

 Miss. Holly is Too Jolly asks group members to complete a variety of questions including grammar based, comparing, identifying, giving details, and summarizing.  Who is Stealing the 12 Days of Christmas? is all summaries of the chapter(s) read in paragraph form.


*Each group has the "Rate this Book" at the end of


Adjective Passage

If you are not looking to create a huge project around the holidays, as there is too many assessments, projects, papers, etc. due I also love included reading into grammar skills. No matter the grammar subject, my students are always reading and identifying it in text.  I think students retain the information more when they practice in text rather than the skill in isolation.

I have created a passage that has LOADS of adjectives in it.  Students are asked to read the passage and find the adjectives within it.  Where does the holiday part come in you may ask? Well, the passage is about a snow day! Many of us can already relate to a snowy filled day already this year!

Students will circle all the adjective they find in the text, but then they are also asked to draw a line to the noun it is describing, as that is just as important as the adjective itself.

Get this product...here!


Tuesday, November 11, 2014

Gobble! Gobble! Gobble!

Thanksgiving is a fun time for students as they are learning important parts of our nation's history (for those reading this blog from the States).  But it is also a time to have a little fun by incorporating some of the great foods, traditions, and crafts into our lessons...when we all have time! I have some sneaky ways to include fun into your classroom, while students are still learning and highly engaged!


Graphing

Thanksgiving Graphing:

I try to make my graphing unit (2nd grade) around the time Thanksgiving rolls around.  This is a great time period to have student survey family, friends, etc. and graph their results. In the past, with my 2nd grade team, we would have students survey family/friends about their favorite type of pie and show results on a Bar Graph.  You can also have fun with Pie Graphs given the name of the game!

I have created a simple document for you to model how to create data from surveying all the way to the analysis part.  I have a teacher example for all three stages.  The students have a "Take Home" document that tells them the steps to take and send the student copies home. Students are to complete a survey to at least 10 family/friends that they know, asking them their favorite Thanksgiving pie flavor.  You can obviously pick your own prompt, but the questioning will not go with it.  I have provided 25 survey ideas for you to use, to assign students, or to give students some ideas to survey friends/family members about. 

Get your own copy...HERE!


Graphing: Quick Assessment/Activity

After finishing the "Take-Home" assignment, you can test student's knowledge by having them complete a pre-made survey to create the bar graph and analysis portion. I have used this as a quick assessment to check my students' understanding of basic graphic.  Although, this activity does not make them do the surveying due to time.  It is also a fun activity to have students do the day before Thanksgiving as an educated math lesson, but still involves crayons and food!

Click HERE to get your own copy 
Another cookie version is available HERE

Numbers

Roll a Thanksgiving Dinner:

I love the "Roll a..." activity, and I have a few in my TPT store for you to get during all of the holidays throughout the school year. If you haven't heard of this type of activity, here is the breakdown:
  1. Students usually work in partners or small groups.
  2. They take turns rolling dice.
  3. Once they roll the dice, they read the number.  The number correlates with an item to draw to create their holiday picture. For example, if they roll a 1, they must draw the plate.  The fun comes in when they are looking for a specific number to roll to complete their picture and they can't get it.  
  4. Students should finish with, in this case, a Thanksgiving dinner drawn on the paper you provide them. 
It is a fun, silly, and teamwork game to play during the holiday week.  I usually use it during my centers, as they can have a couple "fun" activities, and a couple academically driven activities.

Here's the product...you know you want it!


For more "Roll a..." activities:


Tuesday, October 21, 2014

Parent-Teacher Conferences

I found this awesome photo on Pinterest, and couldn't help but lead this post with this picture. Enjoy!

Anyone else feel this way? Worrying about scheduling siblings in other grades back-to-back with your students, parents can't make certain times, and the list goes on with the stress of scheduling Parent/Teacher Conferences.

Before I even get into my organization during conferences, don't forget to add something special up on the walls outside of your classroom so parents/guardians can see what their child has been completing in class.  I am lucky enough to have a couple large spaces outside of my classroom.  One of my bulletin boards was filled with student writing.  We did a creative writing piece to teach descriptive writing.  After reading the story I Need My Monster, students spent a day creating 3 of their own monsters and using many new and exciting words to describe them.  They then selected one monster to write a fun-filled narrative about them.  I put the writing as well as their monster picture up on the bulletin board.

The other side of the wall was filled with our personal character traits posters we made at the beginning of the school year. Parents loved seeing what traits their child used to describe themselves.  It was a great "ice breaker" for the parents and I to discuss their child's work and/or character traits before we got into the academics. 
(See that post here)

I try to stay really organized with a folder per student during this time as I know I only have 15-20 minutes with each parent. Things I include in the folder to be shared with the parent are:

Having all of these items completed, put into the folder, and ready to go makes me feel prepared.  Once all of the folders are packed, I make sure to put them in order of appointment.  That way, when one parent exits, I put that folder aside and the next one is up & ready to go.

A few more helpful hints: Always start with a positive about the child (or a few) so parents/guardians know you are on the side of helping their child.  This will help parents stay more relaxed and willing to hear the hard stuff if you start with something positive.  It is hard for many parents to see issues or problems when it comes to their child and their education.  Go at this issues carefully, and make sure you have data to back up your thoughts. If you know there will be a difficult conferences, ask one of your administrators to sit in on the conference with you. There is no shame in making sure you have "back up".

Good luck, and I know holding 25+ conferences in a short amount of time is difficult.  So continue being rock star teachers!


Monday, August 4, 2014

Writing! Writing! Writing!

I have to be honest, when I first became a classroom teacher I was petrified of teaching writing.  I remember looking at the standards and thinking "Where do I even start?"  With enough practice, and guidance from quarter-long units I was able to understand the breakdown to get to the "big picture".  Now, I absolutely LOVE teaching writing, and I have had some really proud moments of pushing my students to go above and beyond.  My students even understand my expectations, and know they are working above grade level or pushing themselves to work to that level. My third graders were writing 5-paragraphs by December.  So can you tell I really love to teach writing? 

The Writing Process

First ask yourself (or the standard), where you want your students to be by the end of the quarter.  Do you want them to be able to write 3-paragraphs on an opinion piece, biography, or even a research paper? From there I break it down into mini-lessons (Fact vs. Opinion, topic sentences, adjectives, etc).  I decide what will get my students to create great writing...what skills do they need to be successful?

My first year of classroom teaching, I had these Writing Process posters.  Click here for my own version! Make sure you laminate for a lifelong tool! I hung them underneath my black board, and gave each student a clothespin with their class number on it.  Everyone started on the "Writing as a Process" poster.  As we worked our way through the writing process, students would move their clothespin to the stage they were currently working at.  This helped me know where students were and who needed some extra help because they were a few stages behind.
Get your own set

  1. Prewriting
  2. Drafting
  3. Editing (Independently, then with a partner.  Partners must sign their name on the drafts)
  4. Revising (Independently, then with me)
  5. Publishing

If you look closely, you can see the majority of the class is on the 2nd stage: Drafting, but there are still a few students who are Prewriting.  

Especially at third grade, I don't like holding their hands on each stage. I want them to become independent writers, as that is what is expected of them during standardized testing and the real world.  Now, with that being said, I don't just say "write".  I will be creating a similar project alongside them and modeling at the beginning of the lesson. I pace it out depending on how students are performing, and I may move onto showing them how to revise, and students may still be drafting.  

Speaking of editing & revising...I add another round of clothespin into the mix.  Students each have their own clothespin they keep in their art box (different use than the Writing Process one).  I have students edit independently and then with partners first (Step #3).  When they get to Step #4: Revising, they are allowed to come see me.  Instead of having a long line that lasts from my desk to the door, they come put their clothespin on this sheet at my desk and I call them up when I am ready to edit with them.  After much instruction and practice they know not to come put their clip up on the sheet until they have looked it over, read it aloud, and edited it until the couldn't anymore.  
Get the product...HERE!


Writing Binders

So...interesting story on how I created the foundation for my handwriting and writing organization in my classroom.  I didn't help create the supply list for 3rd grade, as I was still teaching 2nd grade at the time.  I had not thought that far in advance anyway.  I looked over the list, and realized every single one of my students was bringing a black 1-inch binder. I went into a small panic, and began asking the other teachers what they used them for.  They all used them for a variety of ways, but I decided I wanted an organized binder for handwriting and writing.

After much thought, I decided to create 4 tabs to help students stay organized.
  • Resources- handouts, rubrics, helpful hints, etc.  For example, after our lesson on character traits, students put a variety list of traits in their binders to use as a resource later in their writing. 
  • Projects- This is where all of their prewriting, rough drafts, and short stories were kept.
  • Handwriting- They would keep all of their handwriting practice pages and assignments in this section to have as a resource.
  • Vocabulary- Students would keep their Vocabulary Matrix from each week's vocabulary words in this section. 


Students were pretty good at keeping this binder organized after much explanation and practice.  I would always do the hole punching ahead of time, or call students up by tables so we could put things in the binder as we created them.  

For more information on other ways I incorporate writing into my classroom visit my post about: Writing Homework. 


Tuesday, July 29, 2014

Back to School Night

Welcome to Our Class! 

Whether you have a Meet the Teacher, Back-to-School Night, or something similar it is best to come prepared and that is what this post will help you do! I do most of these preparations before the school year begins, although putting together folders might be a weekend job or something that a family member might be willing to help out with.  I really believe in these items below, as it keeps parents/guardians on the same page from Day #1.  They know my expectations, and they realize they have their own set of expectations as well.  Look through the post, and feel free to comment with other suggestions and/or questions. 

Parent Folders

Parents receive "Parent Folders" that is filled with many helpful resources and information.   It is located on their child's desk, and I explain the folder during my presentation.  I put together a bright yellow folder with the following pieces of literature (most of which I found through Pinterest). Thank you to my fellow bloggers for providing these wonderful resources! 

- Helpful "At Home" tips for spelling
- Helpful "At Home" tips for math
- Why Read at home?
- Questions to ask child during reading: Fiction & Nonfiction
- Parent School: Reading Skills #1 (give these out monthly)
- Magnet with my contact information
- Brochure (below)
- Any school forms
- Classroom volunteer form
- Classroom Dojo Forms (Classroom Management)
- Common Core for Parents (If your state has made the switch)

Parents are told to keep these folders, as I will send helpful resources home throughout the year, so they are able to help with skills and standards at home as well.  I know it seems like a lot, and not every parent will take advantage of those items.  But if you can just help one parent make learning at home easier...the folders have done their job! The folders are a must in my classroom now, and I now that I have all the documentation organized, it makes it a lot easier from year to year!

Brochure

This year I decided to do something different.  I wanted to create a brochure for a different "look" rather than the letter format.  I wanted it to look different as I knew I was already giving them a lot of paper within their folders.  I put information that parents need to know and have a resource to check periodically.  I go into detail during my presentation (see below), but I do not offer handouts of my PPT just to save paper. In the brochure I highlighted main subject areas, technology use, grading, standardized testing expectations, transportation, special class schedule, and a quick read about myself.  I felt these were the most important pieces of information, but obviously you may have other needs within your own classroom.

Student Work

Our Back-to-School Night is a few weeks into school, so students have completed a decent amount of writing activities/projects. Students are asked at the end of the day to open their Writing Binder to their favorite writing assignment they have completed.  This is great for parents to go in the classroom, find their child's seat, & start reading.  It allows me to be able to greet parents at the door, rather than having a back log of parents waiting to get in the classroom or speak with me.

Parent Sign In

On our back table, I have a sign in sheet, any documentation from the school (technology permission forms) and any additional notes I'd like the parents to see or have their own copy.  You can also make these nice for parents with some decor back there. Check out Pinterest if this is something that interests you! I know there are some other amazing set-ups.

Presentation

I give about a 15 - 20 minute PowerPoint presentation for a quick run-down on my expectations and items I want parents to know from the beginning.  I include things like:


  • Daily Schedule (Breakdown of how much ELA, Math, etc)
  • Detailed Schedule for morning & afternoon
  • Reading expectations
  • Spelling expectations
  • Math expectations
  • Expectations for the end of the year (Reading level, passing of tests, etc)
  • Daily communication (Daily Red Folder, Planner)
  • Homework (I talk about Writing Homework, as I feel parents need to know my high standards with this weekly assignment)
  • Parent Recommendations
  • Class Rules
  • School Rules
  • Classroom management (Class Dojo)
  • Pop Tab Program (Year-long philanthropy project)
  • Technology
  • Parent Involvement (& yellow folder discussion)
  • General Information
  • End with contact information (leave screen so they can program it in their phones if needed)


Saturday, July 26, 2014

31 Reasons to Visit my Teachers Pay Teachers Store

I love the feeling of a sale! I guess you could say I have a shopping problem, but when I walk through the mall or get sale coupons in my email...I just get excited! My Back-to-School gift for my 3L + 1T followers is a sale on 31 of my Back-to-School products starting tomorrow, July 27th.

I have went through all of my products to select the Top 31 items that will make the beginning of the year go smoothly for you all.  Take advantage of this sale it won't last forever! Hint: Sale ends July 29th! 

Click HERE if you're ready to go SHOPPING!

Check out the products below: 

To find these items, visit my store.  Then you can search for the title of the product you'd like to purchase.  


I thank you in advance for your purchases.  Please leave feedback once you have made the purchase.  I wish you a smooth start to your school year and a fantastic year! Go Teachers! 


Sunday, July 20, 2014

Using Social Media & Technology in the Classroom

I challenge you to choose 2 of these forms of technology below to integrate into your classroom this year. As a person who loves technology, it can become overwhelming at times trying to stay up with posts as well as doing your daily job.  I am an avid user of a blog, Twitter, Classroom Dojo, & QR codes. I commend those educators that can include so many of these technologies in the classroom, and get a great participation from parents.

**Check your school district's policy on posting pictures, names, etc. on any type of social media website.  Each district has specific rules that you may have to follow. It is better to be safe, than sorry! 

Blog

Created a blog was my "baby steps" into the educational technology world.  My school district provides each teacher with the option for a classroom blog.  I fiddled around with it, and ended up loving it.  I change my theme from year to year to get a different feel.  At the beginning of the year, I am better about consistently posting 1-2x a week about things we're doing in the classroom. My students' parents had to sign a permission slip to allow pictures to be taken on the blog and other social media websites. I did have a few parents who did not want their child's photo online, which was fine.  I just had to make a conscious effort to keep them out of photos.   I really enjoyed showing the students the blog, and did it almost daily at the beginning of the year to get them excited about it.  I did this in hopes they would go home to show their parents, and then at that point it would become a part of their daily or weekly routine!

I used Wordpress to create my school blog, but as you can see I love Blogger, too. Whatever one you prefer will work! Try them both out.

Things I posted were: 
  • Photos of class activities
  • Reminders about tests/quizzes
  • Reminders about forms due, field trips, etc. 
  • Websites that could help with particular topics we're studying in class
  • Additional resources for parents
  • Videos of in-class activities or even other resources
  • Webcams of animals 
Screenshot of my blog.  You can see I have Twitter embedded in the blog as well.  
Check out my blog...HERE!


Twitter

I just started using Twitter this past school year (2013).  I attached the Twitter account to my blog, so they were able to see quick posts from Twitter as well.  Twitter seemed to be a good match for me.  I was able to put a quick picture up (immediately) without spending a lot of time typing a whole post. I did use this mostly for quick reminders and pictures.  It was nice to be able to show parents immediately what their kids were doing in class that day.  I would also follow other educational accounts and retweet ones that I find beneficial for my students and their families.

Things I posted were: 

  • Special guest teachers 
  • Pictures from science experiments
  • Reminders about tests/quizzes
  • Quick links to educational sites
  • Pictures (no videos)
  • Reminders about forms, field trips, picture days, etc. 
Facebook

As stated above, this is not one that I use in my classroom because I feel that my blog and Twitter combined is the same as Facebook.  I think I might have rethought my decision about a blog and did Facebook if it was allowed in the district at that time.  But I had already established a great blog that I enjoyed, so I wasn't going to stop doing that.  Many teachers use this to post pictures, videos, and reminders just as the other social media tools do.  I think that this and Twitter would be the best form to get to parents as they are common types of social media.  What are your thoughts?

Classroom Management

This year, I tried something new with Class Dojo.  This online program was amazing for my classroom! I explained it to students, showed them the online portal with the Sample Class they give you (with movie star names, might I add).  I also showed parents the online portal at Back-to-School Night.  This portal allows you to set up the positives and negatives, and it keeps track of a point.  One reason I really love this website is because if a student has a bad day and earns a few negative points, he/she can make it up later in the week by earning positive points.  I am a firm believer that everyone has a bad day, and you hate for a student to have a bad grade at the beginning of the week.  My guess is their behavior is going to continue to be bad, because Who cares?! I already have an "F"...it can't get any worse. I would often pull students aside to speak with them about their grade on Thursday or Friday.  This gave them the opportunity to push for great behavior and get his/her grade up.

Also, there are student and parent logins.  Parents can check daily on what their child is doing and how well he/she is performing.  I have parents who really appreciate a daily record.  They are able to talk about it with their child that same day. Students are able to login to a separate account to create their avatar and see how they are performing in class.
This is the report given daily & changes throughout the week. You can look at specific dates and even times of the day to try to figure out when students are doing certain behaviors.  To the left of the page is the personal citizenship score they receive.  The 94% is how the class is doing. I often will give extra rewards if they class together can earn an "A". 

**Updated: I received a few questions on how I distribute the grades to students/families and how I may discipline students for poor choices.  

Citizenship Folders: At my school, students receive a citizenship grade each quarter.  Students earn a citizenship grade each week based on their Dojo Score.  On Friday, I go to "Reports" and there is an option to print records for that particular week.  From there, Dojo sends out a report per student, and I would document that grade in the grade book.  I then would staple them in a manella folder.  Each week I staple the newest form on top.  This gives parents a hard copy to see how their student has performed from a week to week basis, especially if they do not have the ability to get online.  On the other side of the manella folder I have a sheet for parents to sign, recognizing that they saw the score from that week. Folders are due on Monday.  

Discipline:  I'll be honest, this part of Dojo was tricky for me and I had to get in a routine before I became successful at it.  I would keep track on a piece of paper (one of the only forms of paper I used) to see how many minutes students had to sit out of recess time.  This part is completely up to you, and it will depend on how often you give positive/negative points throughout the day.  I would go off percentages.  For example, I would say if you had a "B" in citizenship before recess, you may have to sit out of play time for 5 minutes.  Like I said, it depends on how you run your class and how anchored you are to using the Dojo system.  You could even have students check into their Dojo accounts if you have tablets or devices in the classroom.  

Remind (Formerly Remind 101)

I'll be honest, I have not used this type of technology in the classroom, because I do not want to overwhelm parents with the amount of technology I use in the classroom. Plus, I want to make the most of the few pieces of technology & social media for parents and their children.  Remind is a texting service, where your number is hidden.  You can send reminders out to parents about tests, picture days, bringing certain items back to school.  You set up the service, give the parents the number, and start sending them texts from the teacher.  Now, I have talked with fellow educators who have used this service, and some years they have better participation from parents than others.  What a great way to get a quick message across to parents without having to put together a last minute note to send home.  This service goes out to the whole group, not individual numbers, so clearly it is used for something that the entire class needs to know about.

QR Codes

This is definitely not a piece of technology I use a lot with parents, although I occasionally will put a QR Code on my Weekly Homework Sheet.  QR codes are little digital squares you've seen in magazines and many other products.  Once you scan the QR code with the app on your device, it will take you directly to a website.  You can create your own QR codes for free at QR Code Generator.  You will just save it as a picture and upload it to any document you would like to have it on! I created a QR Code Scavenger Hunt for something for parents and students to do while they wait for their Parent/Teacher Conference.  I attached my blog website, My Big Campus website, and a few fun websites for them to do while they wait for their conference.  I ended up leaving it outside my classroom for the rest of the year for another resource. I found this on Pinterest and adapted it for my own classroom use.  I found it at Transforming Teaching & Learning with iPads. Thanks to this blog for the great idea!! 


Also, since my classroom had a class set of tablets, I would create QR codes for certain websites (normally passages to read), and then students could scan the QR code with their tablet to begin the assignment. It just gives the lesson an added amount of engagement.  If you have just 1 tablet in the classroom, you could rotate it between tables/groups to complete an activity.  Get creative with what you have! 

Tablets/iPads

I applied for a small grant within my district to pilot a class set of tablets for my third graders this past year.  I will be honest, we had out ups and downs during this process but it was AMAZING for many of our classroom projects. I started off the tablet project with learning how to handle them.  I took this part very seriously, and students were sent to a regular classroom desktop computer if they mishandled them.  They were still able to do the activity, but without the tablet.  A few weeks into it (with the occasionally off day) they respected the rule and followed the directions.  Students did activities, special websites, and research.

Activities & Sites Often Used: 

My Big Campus

  • Used consistently as it allowed me to create lessons (bundles), have discussions, post websites/activities.  This website is a must as it allows the teacher to prepare things for the students ahead of time.  Help with organization and time saving for students! 

Padlet

  • I use this as a discussion tool.  Students may be reading from their reading books, passage, etc. and they will use this tool to post an answer or response to a question given.  I often turn on my Dukane to show their answers on the screen.  

Today's Meet

  • I use this also for discussing.  It is also a great first tablet activity.  I pose a silly question that they must answer on this website.  I turn the Dukane on, so the screen shows all of their answers.  It gets the students really excited about discussing! Then I sneak in some real questions. So sneaky, right? 



Thursday, July 17, 2014

First Day of School Activities

There are thousands of different things you can do on the first day, so I'm not saying mine is the perfect combination...it just works for me! I like to start the first day discussing and teaching them about teamwork. All of our [fun] activities are about teamwork throughout the day.  Let me clarify, this post is just about the activities you can do during the day, not the strategic, organizing, & procedures that need to be taught.  Check out An Organized First Day of School for more information in the preparing for this first day!

One suggestion I have to help first year teachers who are feeling a bit overwhelmed about planning for the first day is to keep with your normal time schedule.  What I mean by this is if you have scheduled an hour for your math block, do some sort of other activity (get to know you, supplies, organization, etc). for that hour.  This will get you set into the timing of your day when you get normal subject areas in the mix.  It will also train students with the natural transitions subconsciously. Now, I'm not crazy, I know things will come up unexpectedly during the first day...but sticking to this the best you can will help all. I had to break a few of my blocks down because of School-wide or grade level procedure times.  Check out my "normal" schedule compared to my first day of school schedule.

Daily Schedule: 

You can purchase my full lesson plan template...HERE
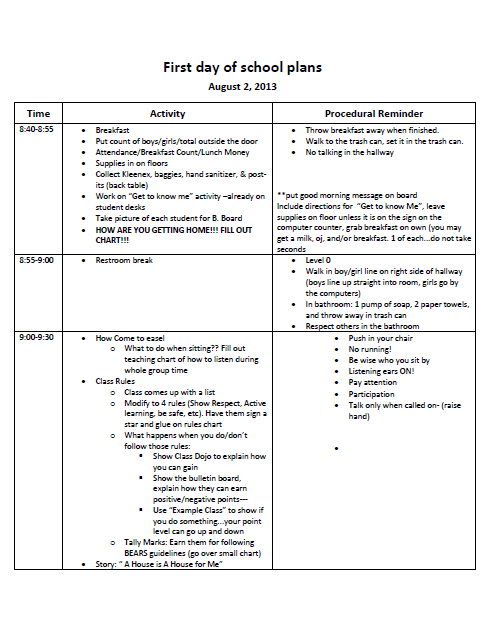
 First Day Schedule: 


So let's let the fun begin with the ACTIVITIES!

Introduction Activity

While students are coming in from their morning transportation, having instructions on the board (depending on the age, obviously) that they can follow, as well as a "Get to Know You" activity.  I just have a general questionnaire about their likes/dislikes/goals, etc.  This will keep them focused and something that is not too challenging, as you don't know the level many of these students are coming in with.  I already have this form on their desk with a sharpened pencil, so there is no confusion on the task.

String Activity

I have students move the desks back, so we can form one large circle as a class.  I then explain that they will be throwing a ball of string around. I show a few times the right and wrong ways to throw the ball of string. I normally get a few giggles on the bad way to throw, which proves my point on not throwing it hard or crazy. Students behave (first day jitters, perhaps?) and throw the ball of string like I ask them to.

After modeling the throw, I start all over and tell them when they catch the ball they will tell the class: 1 thing about themselves, 1 thing they did over the summer, & 1 thing they are looking forward to this school year.  You don't have to do these exactly, but I felt I got a brief overview of the class with their likes and goals for the school year.  After the student shares they have to say a person's name across the circle (just not next to them), and then they throw the ball of yarn.  They must say the name, so they can get to know one another and so no one gets hit in the face. hehe The next students shares his/her 3 answers, and by the end we have this giant web all connecting the entire class.

At this point, I show what happens if I let go.  I get a lot of little 8-year old gasps at this point, and we talk about if one person drops the string we aren't working as a team to make this beautiful design.  We discuss teamwork and what it will look like in the classroom this year.  Students begin sharing stories, which is great!

It will take a decent amount of time. The first year I did it, it took over an hour. Yikes! I didn't plan for that, but I allowed students to share too much.  The following year I did it, and it took about 45 minutes with 25 students.

Character Traits

Depending on the level of students, you may or may not be able to do this activity on the first day of school,  but you could at least do part of it. I did this activity within the first week because one of our first topics was character traits.  I found these little people cutouts with a variety of skin colors which I loved.  I allow students to pick their own person from the variety of colors.

After selecting their person, I got out scrap paper, markers, crayons, etc. and they created their own little person.  Each one was so creative and started to show their personality just based on what they put on their clothes and in their hair.  I created my own person, and began modeling character traits and continuing my lesson using a variety of texts and media.  We even made a giant list of adjectives that describe our traits and I gave them their own list to put in their writing binder for a resource later.

They each came up with 10 character traits on a piece of paper, showed them to me, and then I okay'd them to put them on their poster.  Students loved having these up during Back-to-School Night where they could show their parents what they created.
Read Aloud Options

  • A House is a House for Me (Teaching everything has a home---scissors, pencils, book bags, etc)
  • Chysanthemum (Friendship & being nice)
  • The Crayon Box that Talked  (Teamwork)
  • David Goes to School (Fun & lighthearted about following the rules)
  • Don't Eat the Teacher (Fun & lighthearted)
  • It's Time for School Stinky Face (Teach to not be worried/scared about the first day)
Following the Rules/Procedures

I put a variety of poster board sized paper is up around the room (No more than 6 or it gets chaotic).   Each poster will say a procedure either around the classroom, school, or you could make it about goals.  Students are to write the requirements of those activities at each poster.  You will need to model and show students how to walk around the classroom to complete all of these or it will be a madhouse. Students everywhere! I start by placing a group of students at each poster with a marker.  If you want a highly structured activity you could give them 30 seconds to a minute to write something down, then yell "switch" and they move to the next poster.  If you don't mind a little chaos, you can start them somewhere and as they finish move from poster to poster.  That part is up to you, but I prefer the more structured one for a first day of school activity!  Some questions you could ask:
  • What are things you need to remember when walking down the hall?
  • What are things that you need to do when in the cafeteria? 
  • What should you remember about lining up to leave the classroom? 
  • What are things you should do when you're working in a group setting?
Or you could make it more about goals for your own classroom: 
  • What are things you need to be successful in 3rd grade? 
  • What do you expect to learn in 3rd grade? 
  • What are things I (teacher) can do to help you be successful this year? 
This activity can be done as an anticipatory set or as a follow-up to your lesson. I personally use it as an anticipatory set to get students minds' thinking rather than "quiz" them on the first day of school about what they learned. I mean, we all need some time to warm back up after summer break! Then you can use your answers to discuss what you're expectations are by making an anchor chart of procedures, rules, or even goals.  The opportunities are endless! 

More Ideas

Visit An Organized First Day of School for more ideas on setting your classroom up for success!


Tuesday, July 15, 2014

Breakdown of Each Center/Station

Hopefully you got the basis of what my classroom looks like and how it functions during centers/stations from my first post.  This post will focus on each of the stations that occur in my classroom.  One day, I'll post activities for each of these stations to make life just that much easier for you.  Check out a few FREEBIES below to add in your classroom. Enjoy!

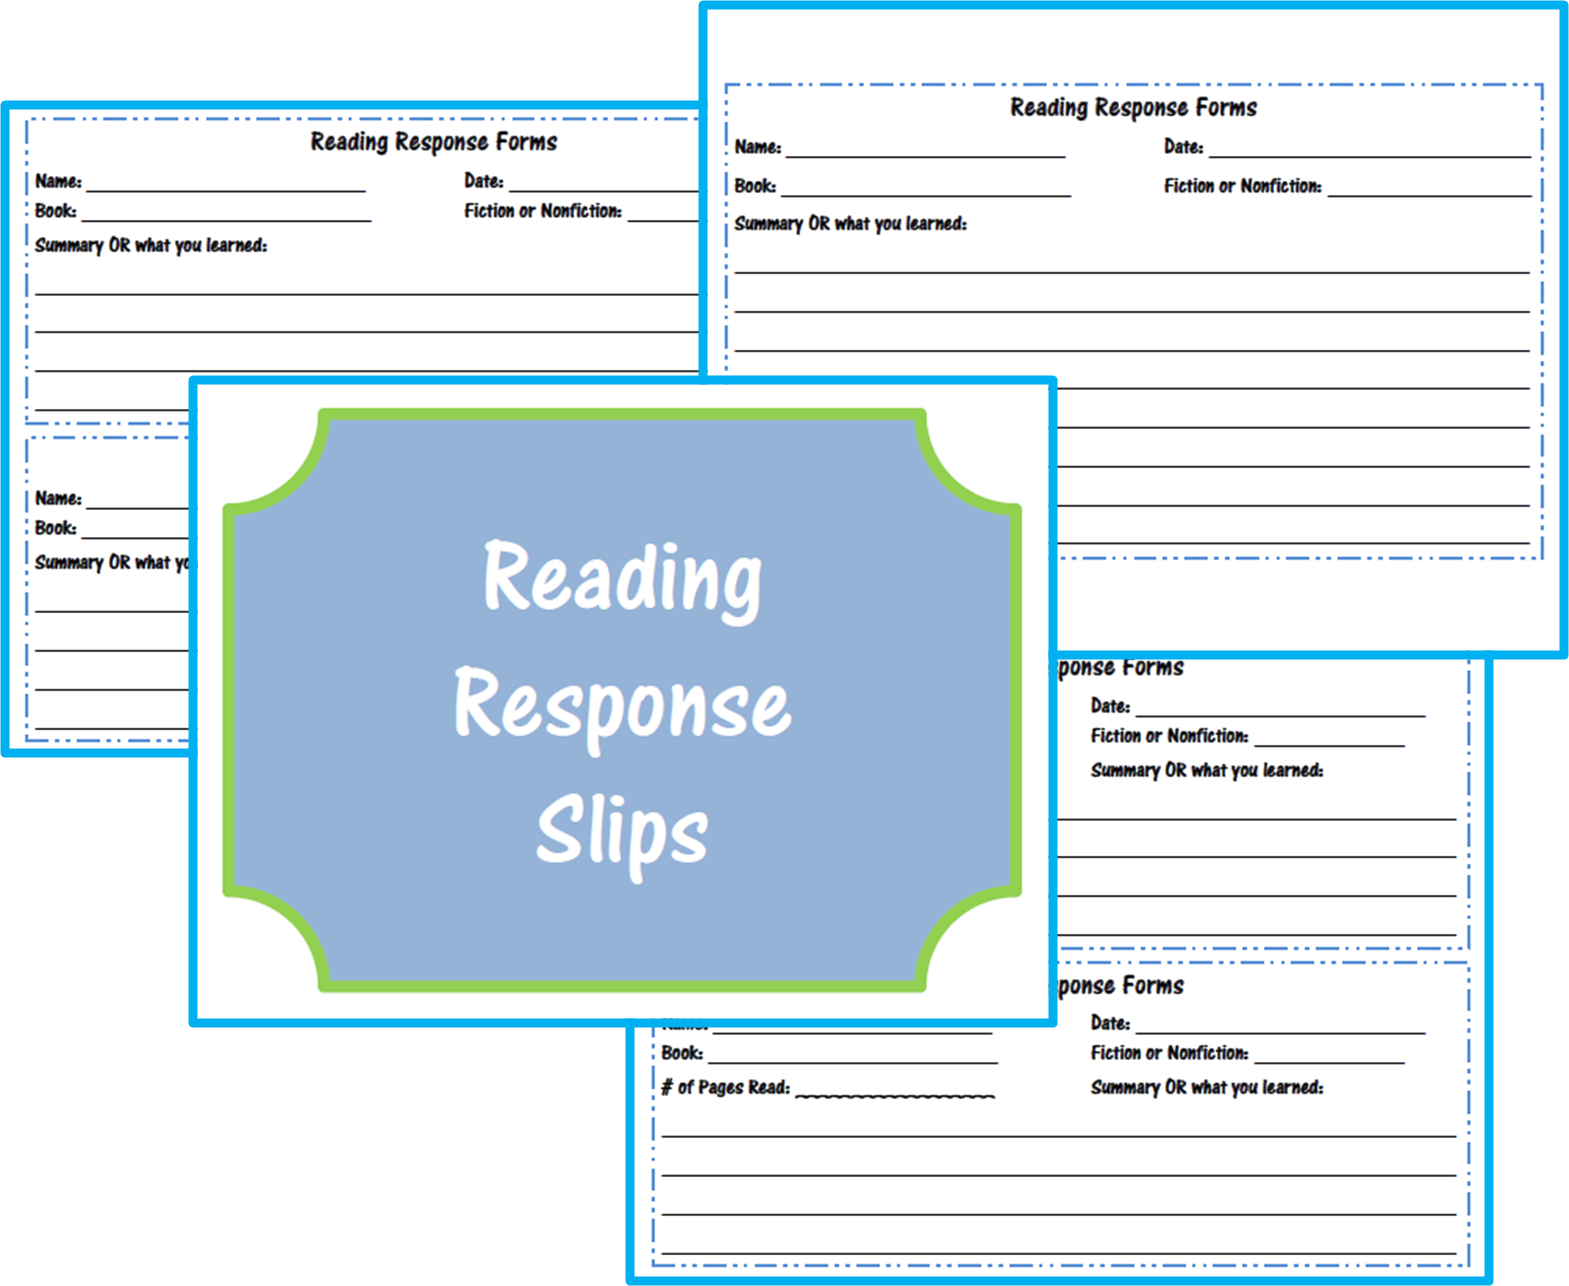
Read to Self:  At this station, my students are required to stay at their seats to read.  If I catch them reading and engaged in their book, I give them a "Hooked on a Book" coupon {FREEBIE}, where the next time they are at the Read to Self station they can read anywhere in the room using pillows, stuffed animals, or the bean bag chair. They really strive for those coupons! One last thing you can incorporate if you want students to have a finished product at this station is a Reading Response Slip.  From this, they either tell me what they learned if it is a non-fiction book or give a brief summary of the story/chapters read. This gives them some responsibility during that station  for the last 5 minutes and the teacher a sense of whether they are actually reading during that time or not. I also make students stick to one book (this depends on grade level) so they can finish books and not start-stop-and never finish.
I kept a basket near my Teacher's table so I could quickly get up when my group was reading or working independently to pass the coupons out.  Students could choose to use them immediately, but often realized to wait because they would have more time the next time they were at Read to Self. 


Check out the Reading Response Slips HERE!

Writing: This station is very flexible in my classroom, just one requirement...to write!  I come up with a variety of activities for students to do here, and many times it is tied into our reading comprehension/response that we are working on during that week/unit.  For example, students may be asked to read 2 short stories/passages and write a paragraph to compare/contrast the two.  I have also allowed free writing, incorporated some grammar skills into their writing assignments, or even reading a variety of passages to identify the genre and why it fits there. 

Word Work: This station really changed from my second to third grade groups and students only visit this station once a week.  In second grade, students are working with stamps, magnetic letters, word families, spelling words, the list goes on and on! In third grade, since students had a good understanding of their phonics skills, I treated it more like a vocabulary station. Students would given an organizer {FREEBIE} to complete items such as the definition, in a sentence, part of speech, picture, & synonym/antonym of the word.  By asking students to do this, they are working on ABC order and guide words as well as what is asked on the organizer.  Check out my post on Vocabulary


Work with Teacher: At this station, I work with individual groups that are working on the same skill or reading at the same level.  Many times it will be focused on fluency practice, a specific standard/skill, comprehension practice, and reading strategies. Look out for a post soon in detail about lessons I have created and the order of them. 


Listening: This is another station that students only visit once a week.  Most of this is done at the computer now that our reading series does not provide a CD for each of the stories from our reading series. On the computer they are completing tasks from a website portal called My Big Campus.  Students are to complete games, activities, quizzes, etc. through this program based on the standards we are working on that week/unit. My class also piloting a classroom set of tablets, so I integrated those into this station too. 


Give this a chance, especially if you are not planning a lot of time for them. In a few months, my students could complete this independently, quickly, & it would be quality work. 

*Work with Teacher (Additional Teacher): In our school, Title I teachers are licensed teachers so I respected their teaching ability and they created their own lessons.  We would co-teach on Mondays during the station time to introduce the learning target for that week.  We would also meet at least once a week to discuss what the groups needed to make sure between the two of us we were covering all of their needs.  I was really lucky that my Title I teachers were amazing and I trusted what they were doing with my students.